Overgrown Galleries
Playable nowA ruin on your island you can raid with a deck, for resources and gold.
You can do this now.
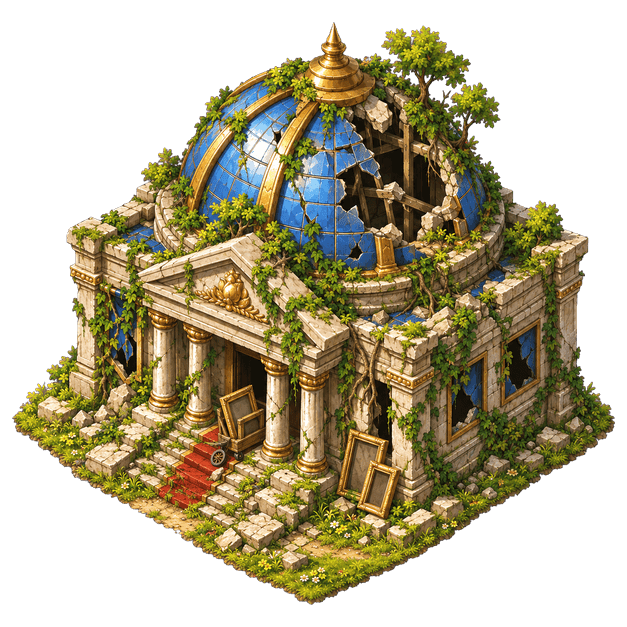
What it is
An Overgrown Gallery stands on the island your first city is on. Orla and her crew are moving a collapsing collection out of it, and they fight to keep it.
You send a deck at it from one of your cities. If you win the battle, your deck comes home with resources and gold; if you lose, it comes home empty.
Losing at level 2 or deeper also damages your deck master and every card destroyed in the battle. Damaged cards fight with lower stats until you repair them.
If the deck you send has Fragile cards, you are asked to confirm first, because losing could ruin them for good.
What a raid costs
- A deck of 30 cards led by a deck master. It cannot be edited while it is away.
- For level 1, nothing else. With no Port or no free ship, your deck walks there from a city on the gallery's island, 2m each way, and its crew carries 300 units of loot home.
- Above level 1, a city with a Port and transport ships. Your deck fills 300 of a ship's 1,000 units, and the loot needs the rest of the space. A deck sails whenever it can, because ships carry more home.
A raid with too few ships still goes: what will not fit stays at the gallery, and the dialog says how much of each resource that is before you launch.
Calling a raid back
While your deck is loading or on its way there, Return turns it round. It is home in as long as it has been out, so a deck still at the Port comes back at once.
No battle is fought, you bring nothing home, and your ships and your deck are free again when the fleet lands. Once it reaches the gallery you cannot call it back: play the match.
Your first raid
Your first raid comes with one free skip. Press Skip the wait while your deck is on its way or while the loot is loading, and it happens at once.
There is only one. It is gone once you press it, and a later raid waits, including a second try at level 1.
Until you have beaten level 1, its match has a Hint button beside End turn. On your turn it names the move your deck would make and outlines the cards. You still make the move, or a different one.
A loss below level 2 damages no cards and costs only the trip, so raid it again.
The battle
Your fleet loads, sails, and waits at the gallery until you play the match. You play every turn yourself: a gallery match has no Play it out and no Skip to the end.
From level 6 the gallery defends itself with a Town Wall, a level higher at each level after it. Until it falls it is the only thing your attacks can hit.
The result is on your history with a replay you can watch turn by turn, exactly as it was played. Reload in the middle of a fight and you are back where you were. The rules are the same as the Arena's, because it is the same engine.
Coming home
After a win the gallery loads your ships, faster at a deeper gallery. You can cast off before it has finished, and whatever is still on the quay stays there. Gold takes no space and always comes with you.
What comes home lands in the city the raid left from, and the gold goes into your purse.
Levels
- You start at level 1. Winning raises your level when your deck leaves the gallery; losing leaves it where it is.
- Each player has their own level. Nothing you do changes anybody else's.
- There are 20 levels. Level 1 is always open. A deeper level opens once artists have submitted every card in its deck, and until then the gallery says it is coming soon. The wanted cards page lists the ones nobody has submitted art for, and you can submit one yourself.
- Once you have beaten every level that is available, you can fight the highest one again while the next is coming. It drops 1% of what it dropped the first time, and it does not raise your level.
Your progress and your win rate are what the PvE leaderboard ranks.
What each level drops
- Level 1: 500 wood, 125 each of stone, glass, coffee and mana, and 200 gold.
- Level 2: 700 wood, 175 each of stone, glass, coffee and mana, and 280 gold.
- Level 3: 900 wood, 225 each of stone, glass, coffee and mana, and 360 gold.
- Level 4: 1100 wood, 275 each of stone, glass, coffee and mana, and 440 gold.
- Level 5: 1300 wood, 325 each of stone, glass, coffee and mana, and 520 gold.
- Level 6: 1500 wood, 375 each of stone, glass, coffee and mana, and 600 gold.
- Level 7: 1700 wood, 425 each of stone, glass, coffee and mana, and 680 gold.
- Level 8: 1900 wood, 475 each of stone, glass, coffee and mana, and 760 gold.
- Level 9: 2100 wood, 525 each of stone, glass, coffee and mana, and 840 gold.
- Level 10: 2300 wood, 575 each of stone, glass, coffee and mana, and 920 gold.
- Level 11: 2500 wood, 625 each of stone, glass, coffee and mana, and 1000 gold.
- Level 12: 2700 wood, 675 each of stone, glass, coffee and mana, and 1080 gold.
- Level 13: 2900 wood, 725 each of stone, glass, coffee and mana, and 1160 gold.
- Level 14: 3100 wood, 775 each of stone, glass, coffee and mana, and 1240 gold.
- Level 15: 3300 wood, 825 each of stone, glass, coffee and mana, and 1320 gold.
- Level 16: 3500 wood, 875 each of stone, glass, coffee and mana, and 1400 gold.
- Level 17: 3700 wood, 925 each of stone, glass, coffee and mana, and 1480 gold.
- Level 18: 3900 wood, 975 each of stone, glass, coffee and mana, and 1560 gold.
- Level 19: 4100 wood, 1025 each of stone, glass, coffee and mana, and 1640 gold.
- Level 20: 4300 wood, 1075 each of stone, glass, coffee and mana, and 1720 gold.
- Level 20 fought again: 43 wood, 11 each of stone, glass, coffee and mana, and 17 gold.
Gold takes no space on a ship. Everything else needs room in the hold.
Platinum
- Your first win at each level pays 5 platinum times the level: 5 at level 1, 20 at level 4. Each level pays this once.
- A win at the highest level fought again pays 1, up to 10 in any 24 hours.
- A loss pays nothing. Platinum sails home with the loot and is yours when the ships are back.
Decks by level
- Level 1: The Collection Is Leaving
- Mostly simple minions, with Guard, Reach and a small damage Action.
- Level 2: The crew organizes
- Guard protects the crew, Skirmish speeds up attacks, and falling stone hits harder.
- Level 3: Nobody leaves empty-handed
- The crew gains summons, card draw and a permanent minion boost.
- Level 4: The roof comes away
- Flying joins the crew, a titan arrives, and demolition hits every enemy minion.
- Level 5: The flooded stores
- Sturdier guards and Reach protect the crew as it crosses the flooded storerooms.
- Level 6: The narrow stairs
- Skirmish attackers and heavier falling stone punish exposed minions.
- Level 7: The upper galleries
- A second Flying threat joins larger minions that boost allies and draw cards.
- Level 8: The crowded landing
- A larger nest and a Guard that leaves a mouse behind make clearing the landing harder.
- Level 9: The open courtyard
- Ready attackers can threaten your deck master immediately once the path is clear.
- Level 10: The last trolley
- The evacuation ends behind a massive Guard, heavier demolition and a stronger permanent boost.
- Level 11: The yard gate
- A handcart relay keeps producing mice, and one Action makes the whole crew bigger.
- Level 12: The sorting floor
- Everything the crew loses pays for itself: damage on a death, a card on a death, and mice from nowhere.
- Level 13: The statue hall
- Statues, and a row of plinths that makes every statue standing bigger at the end of every turn.
- Level 14: The dressing room
- Two pieces of Equipment and a Ready body to carry them.
- Level 15: The night watch
- The crew stops building and starts answering: a whistle, a condemnation for anything big, and a desk that sends a minion home.
- Level 16: The vault reopens
- Orla is gone. Ledger counts the hall at the end of every turn, and the cranes bring out something too big to trade with.
- Level 17: The reading room
- Cards, and health back on the keeper. The hall outlasts you if you let it.
- Level 18: The lantern walk
- A lantern in the window takes a point off your deck master every turn, and the crew can finish from a long way out.
- Level 19: The procession
- Everything moves at once: Ready bodies arriving into a board that has just grown by +2/+2.
- Level 20: The hall itself
- The building joins in, closing time clears your board, and the chandelier finishes whatever is left.